Getting started
Install the varsafe CLI, sign in, store a secret and run your app with it, with no .env file on disk. About five minutes.
When you finish, your app’s read is in the audit log. From there the same setup scales out: invite your team with a role each, give your pipeline a token of its own, and connect your coding agent on a grant you approve.
Prerequisites
You need
A varsafe account. Sign up free: no card, free for up to 3 people.
Supported
Linux and macOS, x64 and arm64, on both glibc and musl, including Raspberry Pi, Graviton and ARM CI runners. Windows works via WSL.
On the machine
curl and bash to run the installer, and a browser on any device to approve the sign-in.
From zero to injected secrets
Install the CLI
The CLI ships as a self-contained binary (it is not on npm). One command installs it in ~/.varsafe/bin and adds that directory to your shell’s PATH:
curl -fsSL https://varsafe.dev/install.sh | bashBefore anything lands on your PATH, the installer checks the release’s publisher signature and checksum, then runs the downloaded binary once, so a tampered or broken download fails loudly instead of installing. varsafe update makes the same checks.
Open a new shell, then confirm:
varsafe --versionAt a terminal, the CLI tells you when a newer release is out. Run varsafe update to install it.
Command not found?
The installer adds a PATH line to your shell config (~/.zshrc, ~/.bashrc, or fish’s config.fish). If varsafe is not found, open a new terminal or run:
export PATH="$HOME/.varsafe/bin:$PATH"Alpine and other musl systems
varsafe needs libstdc++ and libgcc on musl-based systems; without them the binary cannot start. Running as root, the installer adds them for you. Otherwise it stops and asks you to run:
apk add --no-cache libstdc++ libgccOr re-run the installer with VARSAFE_INSTALL_PREREQS=1 to let it use sudo. It never does that on its own: a script piped from the internet should not change your system packages just because sudo happens to be available.
The installer also needs a tool to check the release signature, which stock Alpine lacks. Install openssh-keygen (or openssl):
apk add --no-cache openssh-keygenWithout one it stops with Cannot verify the release signature on this machine — nothing was installed.
Sign in
varsafe loginYour browser opens on varsafe and the terminal shows a short code. Type that code into the browser page, then choose what this login may do:
- Read only lists projects, environments and key names. Values stay hidden.
- Standard, the default, covers
varsafe run,getandexport: it can read values but change nothing. - Full access adds creating, updating and deleting secrets.
Approve, and the terminal confirms which account and teams it is signed in to. No password passes through the terminal, and the login can never do more than your role in each team allows.
On a machine with no OS keychain, such as some WSL and server setups, the approval page offers a machine token instead: limited to one team and the projects and environments you choose, and valid for at most 30 days. See signing in without a keychain.
On a machine with no browser (over SSH, say), the CLI prints the approval link instead: open it on any device. CI runners and containers authenticate with an API token, as shown in Run it in CI.
Choose a project and environment
Signing up already created a team, a starter project, and three environments: development, staging and production. Point the CLI at one:
varsafe usePick the project and environment from the list. Inside a git repository, the choice is saved to a small .varsafe file at the repository root; elsewhere it is saved for your user. Either way, the commands that follow need no -p or -e.
In a script, name them instead: varsafe use -p my-api -e development.
Store a secret
A secret value is never accepted as a command-line argument, because arguments leak into shell history and ps output. Pick the input that suits you:
varsafe set DATABASE_URLLeave out the value and the CLI asks for it with masked input. Best at a terminal.
printf %s 'postgres://app:app@localhost:5432/app' | varsafe set DATABASE_URL --stdinBest in scripts, where there is nothing to type into.
varsafe set TLS_PRIVATE_KEY --from-file ./server.keyBest for multi-line values such as certificates and private keys.
varsafe set API_KEY --from-env BUILD_API_KEYBest in CI, where the value already exists as a variable.
Then check it landed:
varsafe list               # keys only, values masked
varsafe get DATABASE_URL # prints the value; the read is recordedRun your app with it
This is the everyday workflow. varsafe run fetches the environment’s secrets and starts your command with them as environment variables. Nothing is written to disk, and the values go when the process exits.
Check it first with a command every machine has:
varsafe run -- sh -c 'echo "DATABASE_URL is ${DATABASE_URL:+set}"'The CLI prints Injecting 1 secret from … with the project and environment it read, then the command prints DATABASE_URL is set. The sh -c '…' matters: written as varsafe run -- echo $DATABASE_URL, your own shell would expand the variable, empty, before varsafe ever ran.
Then start your app the same way, from its directory, with whatever command you normally use:
varsafe run -- npm run devYour app has the value; your shell and your disk never did.
Recap
| Command | What it does |
|---|---|
varsafe use |
Chooses the project and environment the next commands use |
varsafe set KEY |
Stores a secret, asking for the value with masked input |
varsafe list |
Shows the keys in scope, values masked |
varsafe run -- <command> |
Runs your app with its secrets in its environment, nothing on disk |
varsafe export --plain --tmpfs -o app.env |
Writes a file to RAM, for a tool that will only read a file |
Everything else is a variation on these. When in doubt, varsafe status shows which credential, project and environment the next command will use.
When a tool insists on a file
Most tools read their configuration from the environment, so varsafe run -- <tool> covers them. For one that will only read a file, write it to RAM rather than to disk:
varsafe export --plain --tmpfs -o app.env--tmpfs puts the file in /dev/shm/ on Linux, readable by you only, and --plain is what lets the tool read it. Delete it when the tool is done. JSON, YAML and Docker formats are always plaintext; exporting lists them.
Without --plain, a .env export is encrypted, value by value, to its environment. That file is safe to commit or hand over, but it is not for a tool to read: varsafe run --env-file .env -- <command> opens it, for anyone allowed to read the environment. See encrypted .env files.
The same flow, scripted
These scripts run in our test suite, so they stay correct. They sign in the way automation does: VARSAFE_API_TOKEN holds an API token, so no varsafe login step is needed. VARSAFE_PROJECT is the script’s own variable, passed to -p; the CLI reads no project variable.
Choose a project, store a secret and read it back:
# docs-test: local-stack
# Store a secret and read it back.
set -euo pipefail

# No `varsafe login` here: VARSAFE_API_TOKEN is already in the environment and the
# CLI picks it up automatically. That is the only auth path that works on a
# headless runner, where `login` has no keychain to persist to.

# Set your default project and environment once
varsafe use -p "$VARSAFE_PROJECT" -e development

# Store a secret. The value comes in on stdin — passing it as an argument is
# refused, because arguments leak via shell history and `ps`.
printf %s 'postgres://app:app@localhost:5432/app' | varsafe set DATABASE_URL --stdin

# List keys (values stay hidden by default)
varsafe list

# Read a single value (pipe-friendly)
varsafe get DATABASE_URL > /dev/null

echo "OK:quickstart"
Injection end to end, including --include to pass only the keys a command needs. Each test -n proves the value reached the child process:
# docs-test: local-stack
# Inject secrets into a child process as environment variables — no file
# is ever written to disk.
set -euo pipefail

# VARSAFE_API_TOKEN in the environment authenticates every command below; `varsafe
# login` is neither needed nor possible on a headless runner (no keychain).
varsafe use -p "$VARSAFE_PROJECT" -e development

printf %s 'vsafe_example_run_inject_value' | varsafe set API_KEY --stdin

# The child process sees API_KEY; your shell never does.
varsafe run -- sh -c 'test -n "$API_KEY"'

# Only inject secrets matching a pattern
varsafe run --include 'API_*' -- sh -c 'test -n "$API_KEY"'

# --include can be repeated, and the patterns are unioned. This is the one check that
# exercises the real flag parsing rather than an already-joined string: repeats used to
# keep only the last pattern, so OTHER_TOKEN would have arrived empty here.
printf %s 'vsafe_example_run_inject_other' | varsafe set OTHER_TOKEN --stdin
varsafe run --include 'API_*' --include 'OTHER_*' -- \
  sh -c 'test -n "$API_KEY" && test -n "$OTHER_TOKEN"'

# `list` must agree with what `run` injects, so its own repeated flag is checked too.
test "$(varsafe list --include 'API_*' --include 'OTHER_*' --json | grep -c '"key"')" = 2

echo "OK:run-inject"
Your workspace
The dashboard shows every project and environment side by side, with the audit trail of who read or changed what:
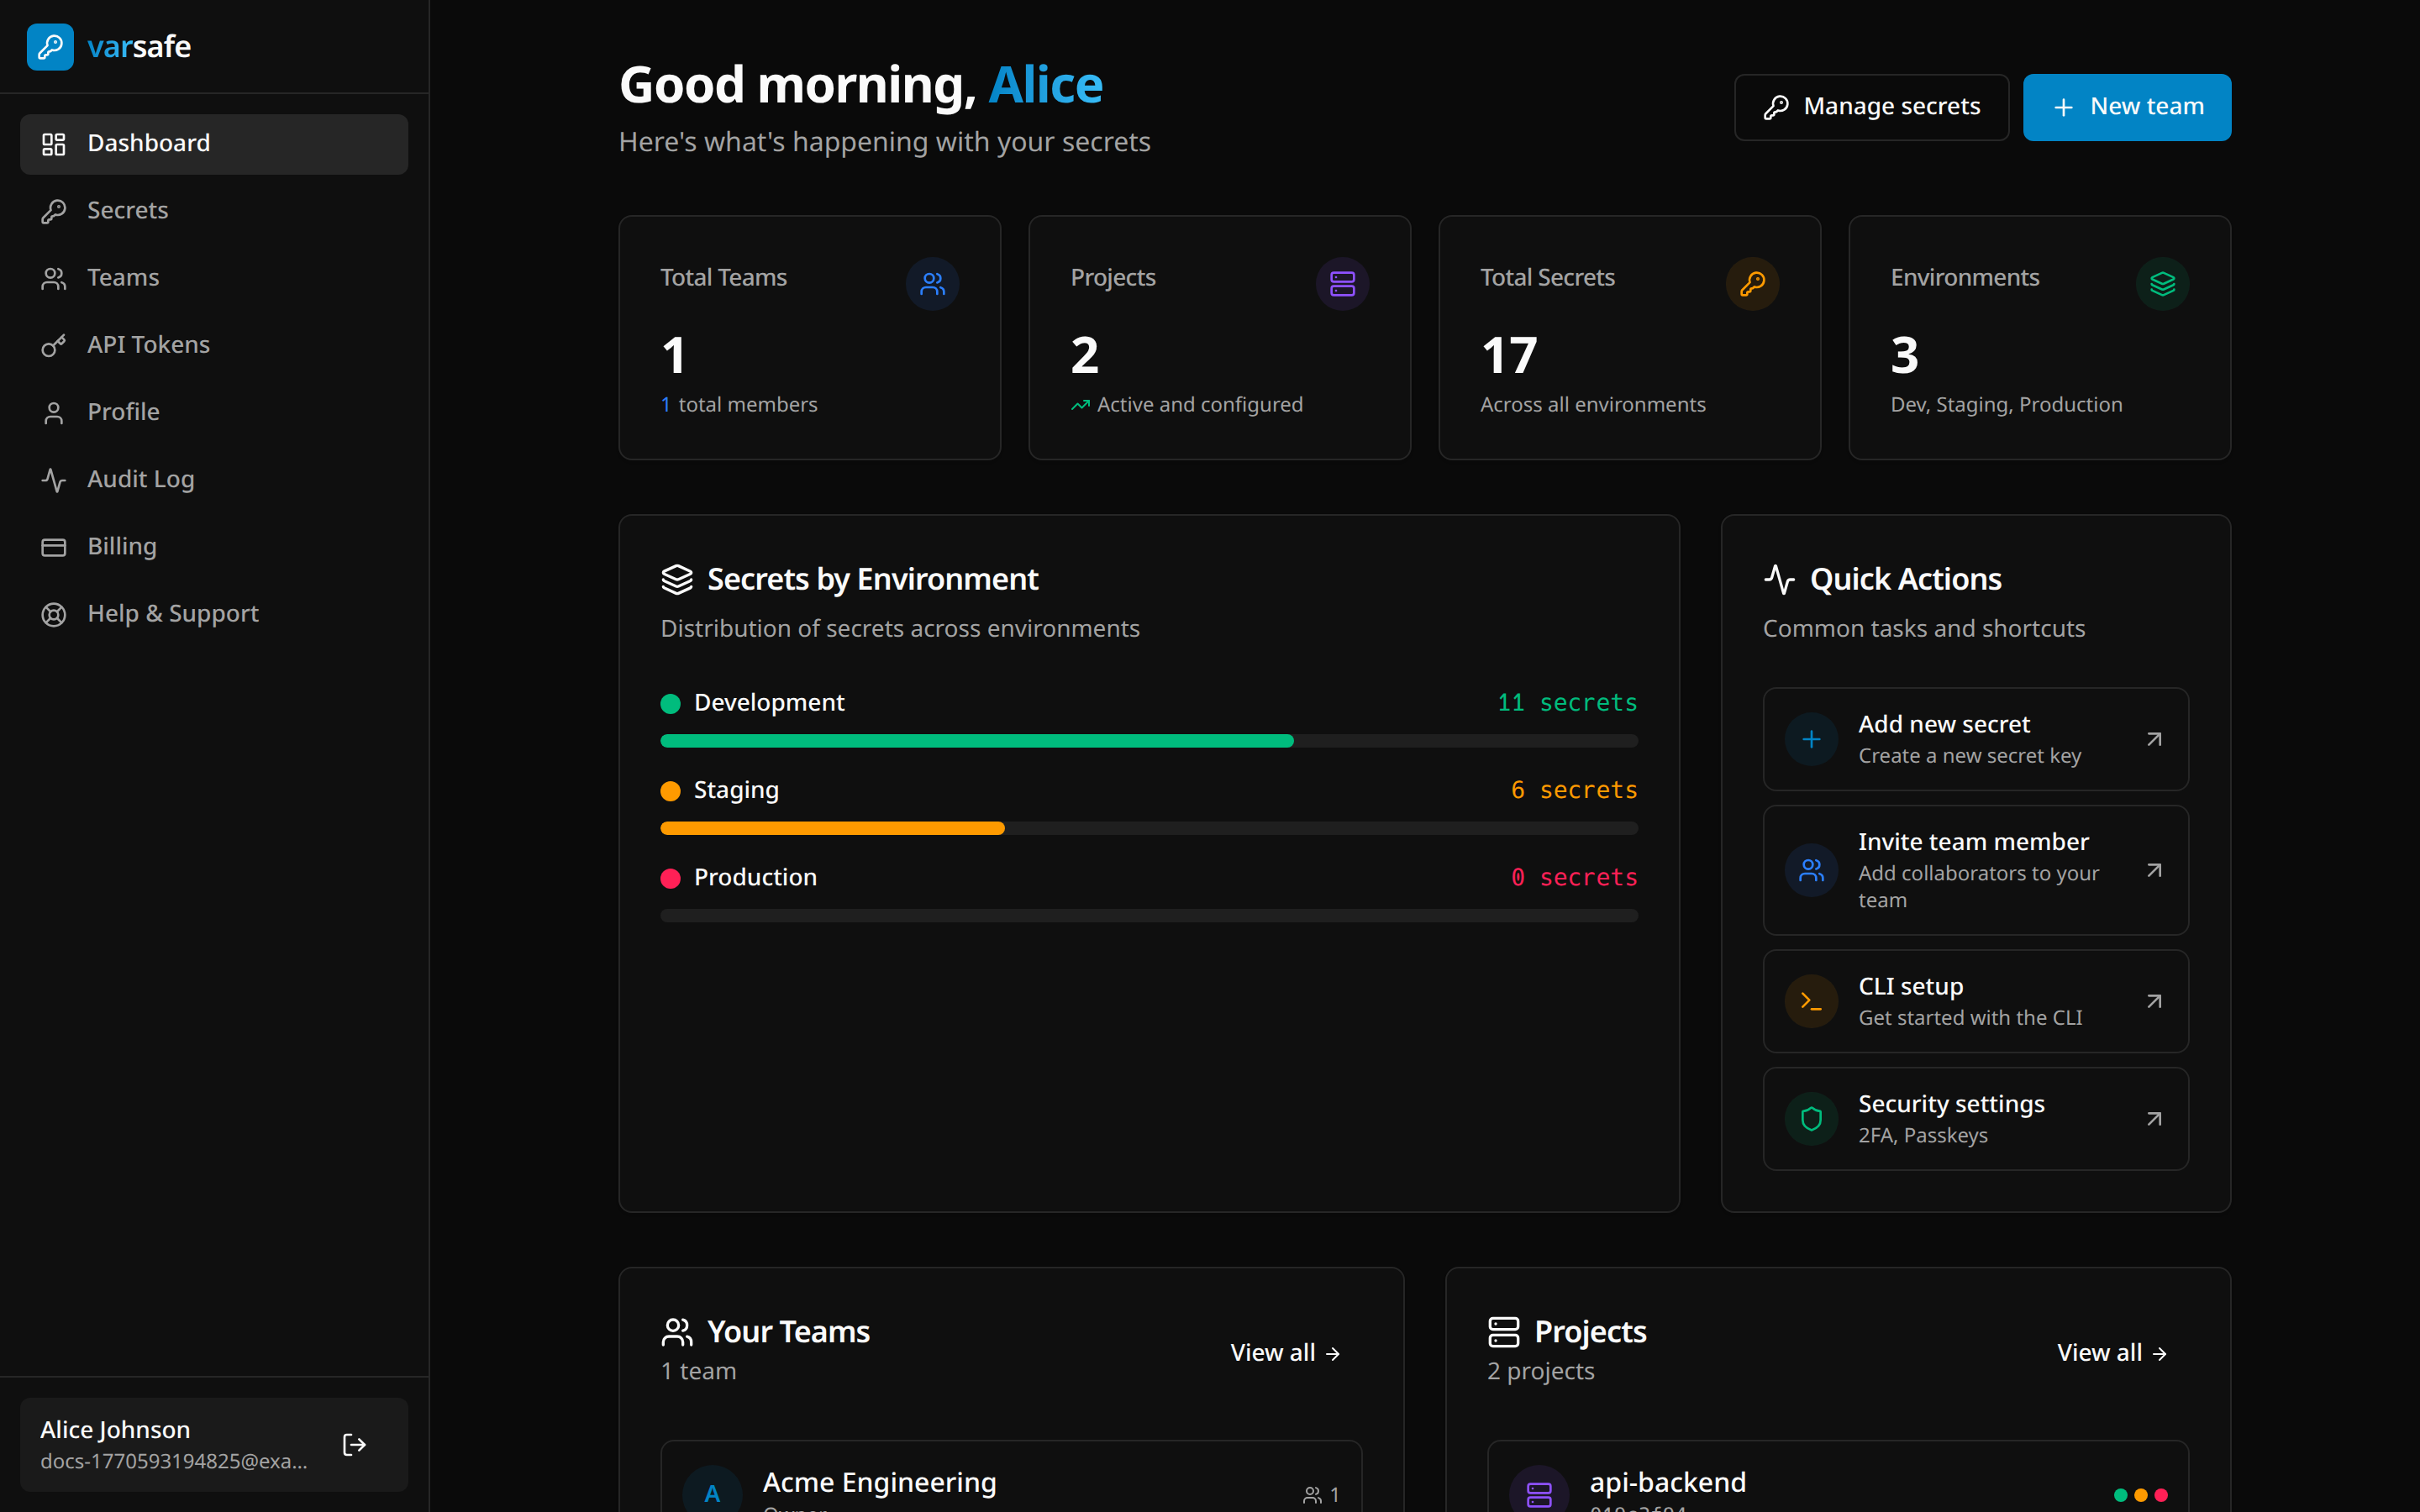
You start with one project and three environments. Add a project per application or repository, and an environment for each extra stage, such as QA or a demo.
| Environment | -e slug |
Purpose | Protected |
|---|---|---|---|
| Development | development |
Local development | No |
| Staging | staging |
Pre-production testing | No |
| Production | production |
Live systems | Yes |
The slug is what you pass to -e. It is set when the environment is created and never changes: renaming an environment changes only the name people see.
Protected means only owners and admins can change its secrets; developers and operators can read them, viewers cannot. Production starts protected, and you can protect any environment in its settings. In the CLI, varsafe set and varsafe unset on a protected environment also ask you to type its slug to confirm, or take -y in automation.
A few things are quicker in the dashboard:
- Moving an existing project in.
varsafe import .envbrings a whole.envfile in, after showing you its plan; the Add secrets card on the Secrets page takes a pasted or dropped file too. Move an existing .env into varsafe covers both, and cleaning up afterwards. - Undoing a change. Each environment keeps its last 10 saved versions, and its history can be rolled back to before any of those changes, with a preview first.
- Comparing environments. See which keys staging has that production is missing before you release.
Bring your team
Invite teammates from the Teams page with Invite member, and give each a role: admin, developer, operator, viewer or billing. (Every team has exactly one owner, at first the person who created it; ownership can be transferred.) A developer can change development and staging but only read production; a viewer never sees production at all. The roles reference has the full matrix.
When someone leaves, removing them revokes their CLI logins, their agent grants and the API tokens they created, in one step. Onboard and offboard walks through both sides, including your teammate’s first day.
Run it in CI
A pipeline gets its own API token rather than someone’s login, so it reaches only what its job needs and shows up under its own name in the audit log.
- In the dashboard, open API tokens and click Create API Token.
- Name it after the pipeline, limit it to the projects and environments the job uses, and leave it read-only unless the job writes secrets. Every new token expires: up to 90 days on the Developer plan, up to 365 on Team.
- Copy the
vs_at_...token (it is shown only once) into your CI provider’s secret store.
Then install the CLI in the job and run your deploy through it. The CLI reads the token from VARSAFE_API_TOKEN, so there is no login step:
# Inject secrets into a GitHub Actions job with an API token.
# VARSAFE_API_TOKEN is a repository secret; VARSAFE_PROJECT_ID a repository variable.
name: deploy
on:
  push:
    branches: [main]
jobs:
  deploy:
    runs-on: ubuntu-latest
    steps:
      - uses: actions/checkout@v4
      - name: Install varsafe
        run: |
          curl -fsSL https://varsafe.dev/install.sh | bash
          echo "$HOME/.varsafe/bin" >> "$GITHUB_PATH"
      - name: Deploy with secrets
        env:
          VARSAFE_API_TOKEN: ${{ secrets.VARSAFE_API_TOKEN }}
        # No login step: every command reads VARSAFE_API_TOKEN from the job environment.
        # Passing a token inline (`--token "$VARSAFE_API_TOKEN"`) is refused — argv leaks
        # to shell history and process listings.
        run: |
          varsafe run -i "${{ vars.VARSAFE_PROJECT_ID }}" -e production -- npm run deploy
varsafe run keeps the token itself out of your deploy script’s environment, so the script gets the secrets and not the credential that fetched them. CI/CD pipelines covers GitLab CI, tokens per pipeline and failing fast on a revoked token.
Connect your coding agent
Agents such as Claude Code, Cursor, Codex and VS Code connect over MCP. You approve a grant on a consent screen: which team, which access level, and optionally which projects and environments. Values stay out of reach unless you approve a level that includes them, and an agent can never do more than your own role allows: every secret operation is checked against your current role, and recorded in the audit log. Connect an agent has the setup for each client.
An agent that runs shell commands can also use the CLI, with the login on that machine and what you approved for that login, which the agent grant does not narrow. varsafe run hands the values to the command it starts, not to the agent. Agent safety explains how to keep both narrow.
Next steps
Pick the one that matches what you are doing next:
- Local development: switch environments, share the project choice with a
.varsafefile, work across repositories - Move an existing .env into varsafe: import what you have, then delete the plaintext file
- Onboard and offboard: invite a teammate and get them to their first
varsafe run - CI/CD pipelines: a scoped token per pipeline, in GitHub Actions or GitLab CI
- AI agents (MCP) and Agent safety: connect Claude Code, Cursor, Codex or VS Code on a narrow grant
- Core concepts and the Security model: how it works, and what we do not claim